Configuring the App for Real-Time Synchronization (Jira Cloud)
- Install Peeklogic Jira Connector from Atlassian Jira Marketplace to your Jira Cloud Instance by clicking the ‘Get it now’ button.
- Create Connected App on your Salesforce CRM Account.
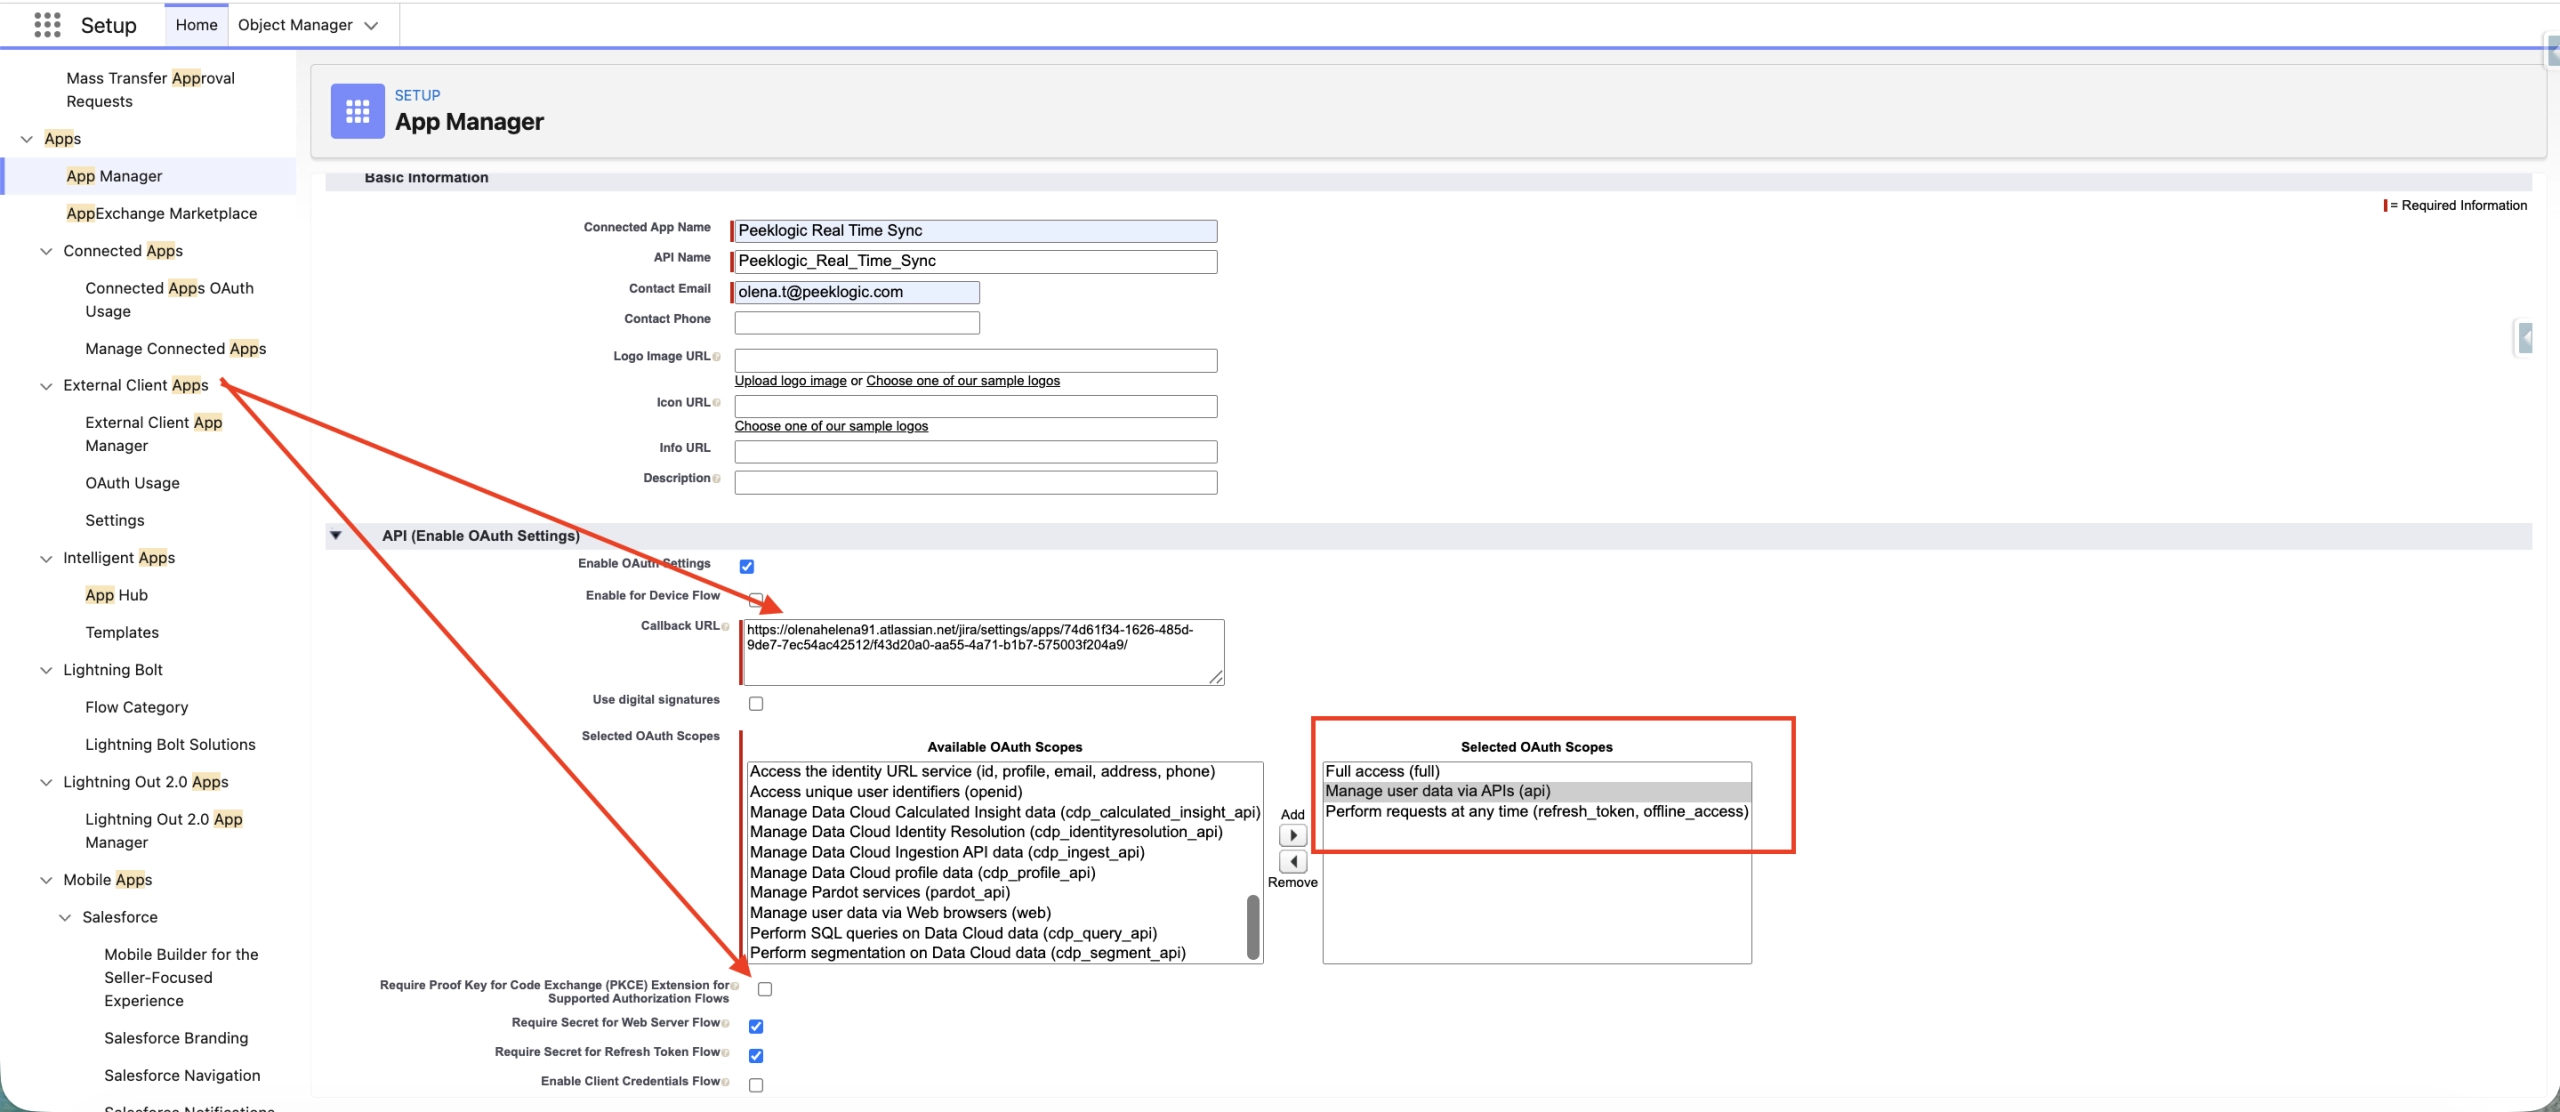
- Navigate to Setup -> External Client App Settings -> Create New Connected App and configure it.

Find Peeklogic Salesforce and Jira Connector app in Apps in Jira.
Copy-Paste Callback URL from the link of your Jira App from your Atlassian environment.
Check if the Require Proof Key for Code Exchange (PKCE) Extension for Supported Authorization Flows is disabled.

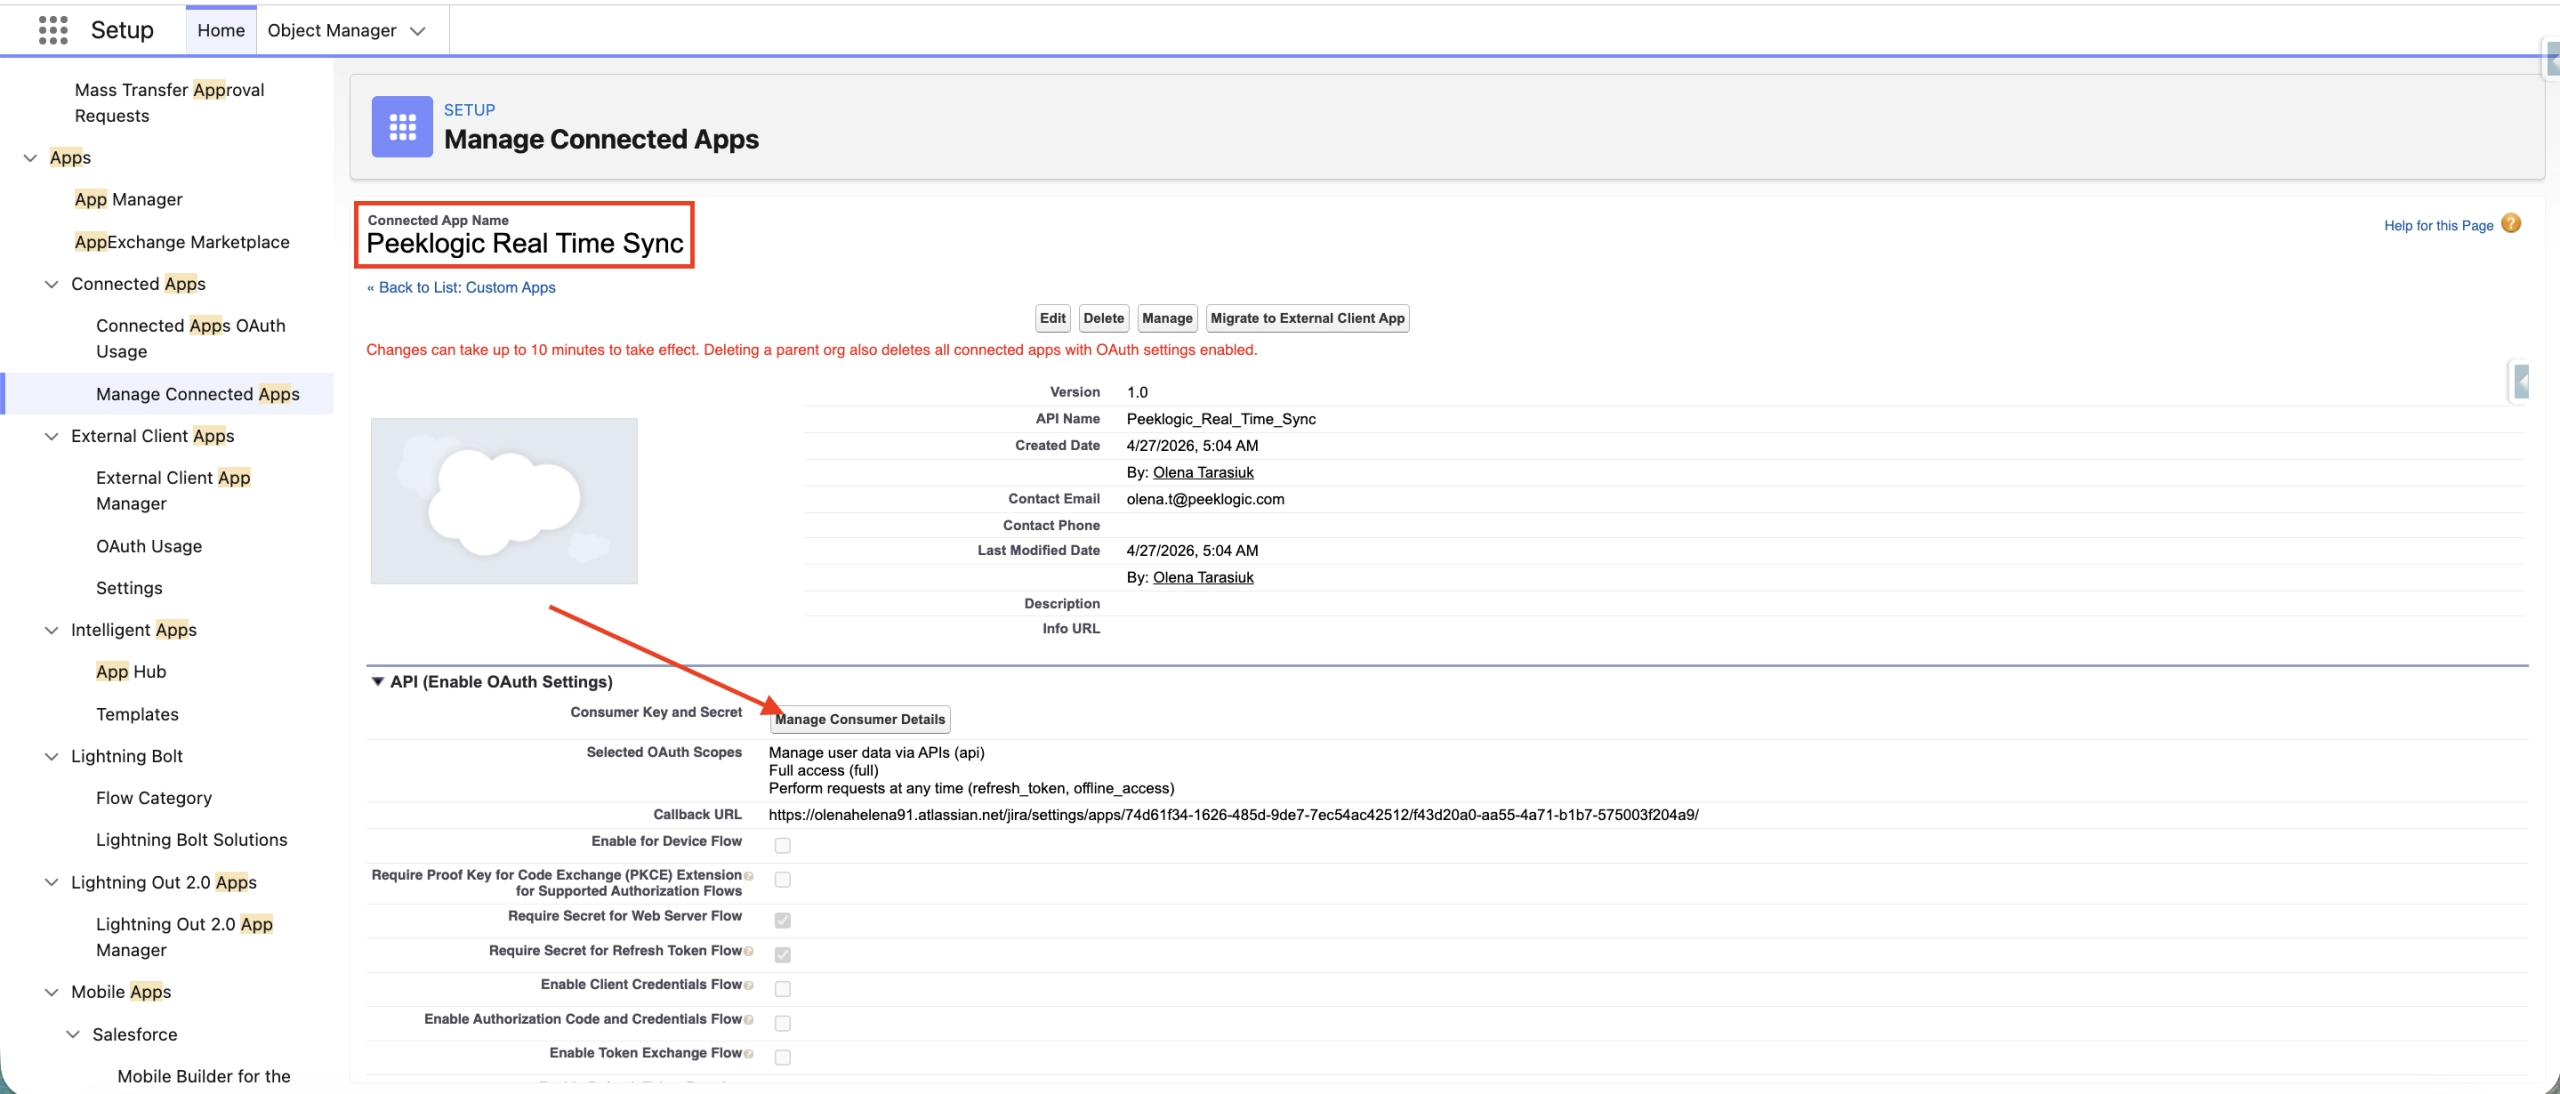
To find Client_Id and Client_Secret click on the ‘Manage Consumer Details’ button of the Connected App to Jira that was created before.
Notes: It usually takes about 10–20 minutes for the app to start working properly.
Fill in Client_Id and Client_Secret of Peeklogic Salesforce and Jira Connector App.

To connect your Atlassian Jira and Salesforce CRM instances click on the ‘Save and Login’ button.
Create External Client App if a Connected App is Unavailable
Create an External Client App on your Salesforce CRM Account.
Navigate to Setup -> External Client App Settings -> Create New External Client App and configure it.

Fill in the External Client App Name and Contact Email fields.

Select the “Enable OAuth” checkbox.
Enter the Jira URL in the Callback URL field.
From the available OAuth scopes select Full Access and Perform requests at any time (refresh_token, offline_access).

Uncheck all checkboxes in the Security section.

Click the Create button.
Navigate to the Settings tab, scroll down to OAuth Settings, and click on the Consumer Key and Consumer Secret.

Notes: It usually takes about 5–15 minutes for the app to start working properly.
Fill in the Client ID and Client Secret of the Peeklogic Salesforce and Jira Connector app on the Jira side.
Copy-Paste Callback URL from the link of your Peeklogic Salesforce and Jira App from your Atlassian environment.