Peeklogic Connector for Salesforce PRO
Key Features:
- Multiple Salesforce connections per Jira instance with granular access control
- Project-level sync settings with configurable issue types
- Salesforce object field mapping and custom layout configuration
- Per-project visibility control for the three user-facing components
- Inline record linking, creation, and detailed viewing from within Jira issues
- Activity timeline showing Salesforce calls, emails, and calendar events
- Cross-platform report builder with charts, grouping, filters, and export
2. Prerequisites
Before installing and configuring the connector, ensure the following requirements are met.
- Salesforce Managed Package
Install the Peeklogic Jira Connector managed package in your Salesforce org. Visit peeklogic.com for setup instructions. During installation, note the namespace prefix (e.g., peeklogic_jc) — you will need it in Section 6.
- Salesforce Connected App
Create a Connected App in Salesforce to enable OAuth:
- Setup → App Manager → New Connected App
- Enable OAuth Settings
- Set Callback URL (provided by the connector form when creating a connection)
- OAuth Scopes: Full access + Refresh token
- Save → copy Consumer Key (Client ID) and Consumer Secret
- Remote Site Settings
After creating a connection, copy the Web Service URL from the API Key modal and add its domain to Salesforce Remote Site Settings (Setup → Security → Remote Site Settings) to allow Salesforce to call Jira for automatic sync.
- Jira Admin Access
Jira Site Administrator permissions are required to access app settings and configure connections, sync settings, layouts, and visibility rules.
3. Getting Started
Accessing the Connector
The connector settings are accessible from the Peeklogic Salesforce And Jira Connector app page in your Jira administration panel. User-facing components (Properties panel, Activities tab, Reports page) are accessible directly within individual Jira projects and issues.
First-Time Setup Workflow
- Create at least one Salesforce Connection (Section 4).
- Configure Jira Settings — define which Jira projects and issue types participate in the sync (Section 5).
- Configure Salesforce Settings — add Salesforce objects and set up page layouts and field mapping (Section 6).
- Configure App Modules Visibility — decide which Jira projects should display which user-facing components (Section 7).
- Test the integration by opening a Jira issue and verifying the Salesforce Properties panel is visible.
4. Admin Module: Connection
The Connection module is the entry point for setting up and managing OAuth-based connections to one or more Salesforce organizations. Each connection represents an authorized link between your Jira instance and a Salesforce org. All other settings (Jira Settings, Salesforce Settings, etc.) are scoped per connection via a dropdown at the top of those pages.
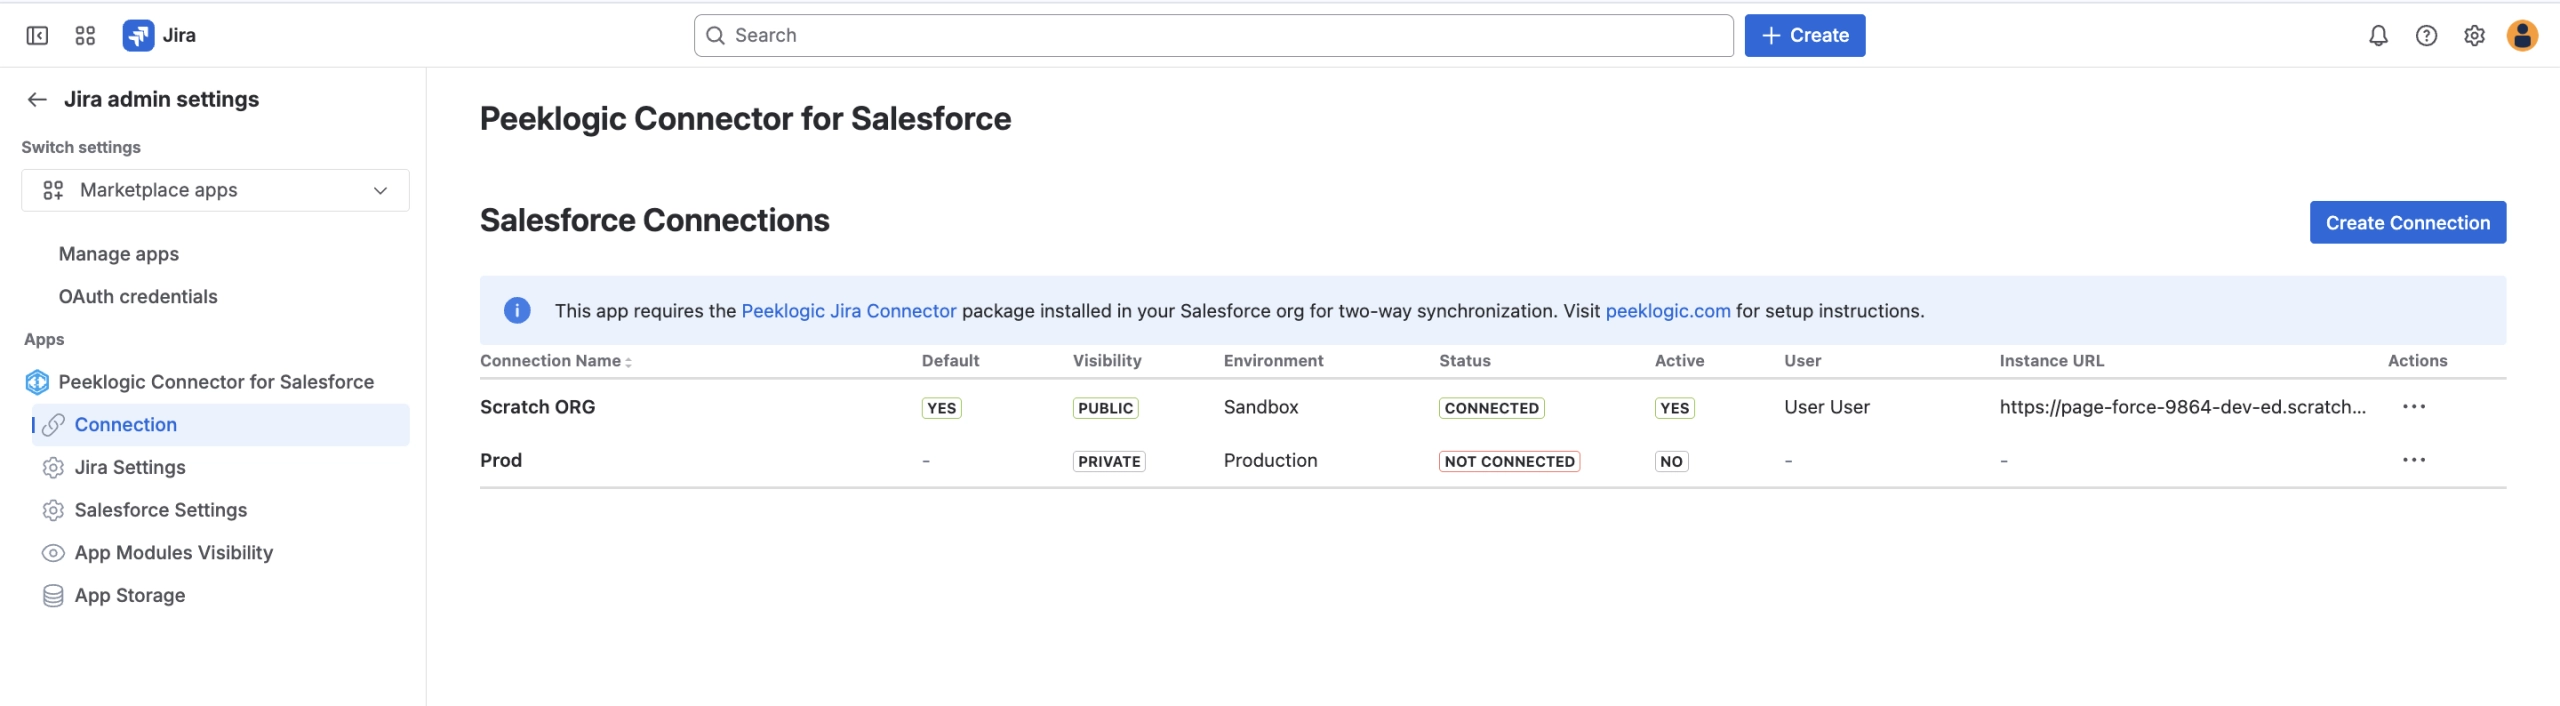
Connections Table
The main page displays all configured connections with the following columns:
| Field | Description |
| Connection Name | The display name assigned to this connection. |
| Salesforce URL | The Salesforce org URL used to establish the OAuth connection. |
| Visibility | PUBLIC or PRIVATE — controls who can access this connection. |
| Environment | The Salesforce environment type (e.g., Production, Sandbox). |
| Active | YES or NO — indicates whether the connection is currently active. |
| Operations | An Actions (···) button providing connection management options. |
Creating a Connection
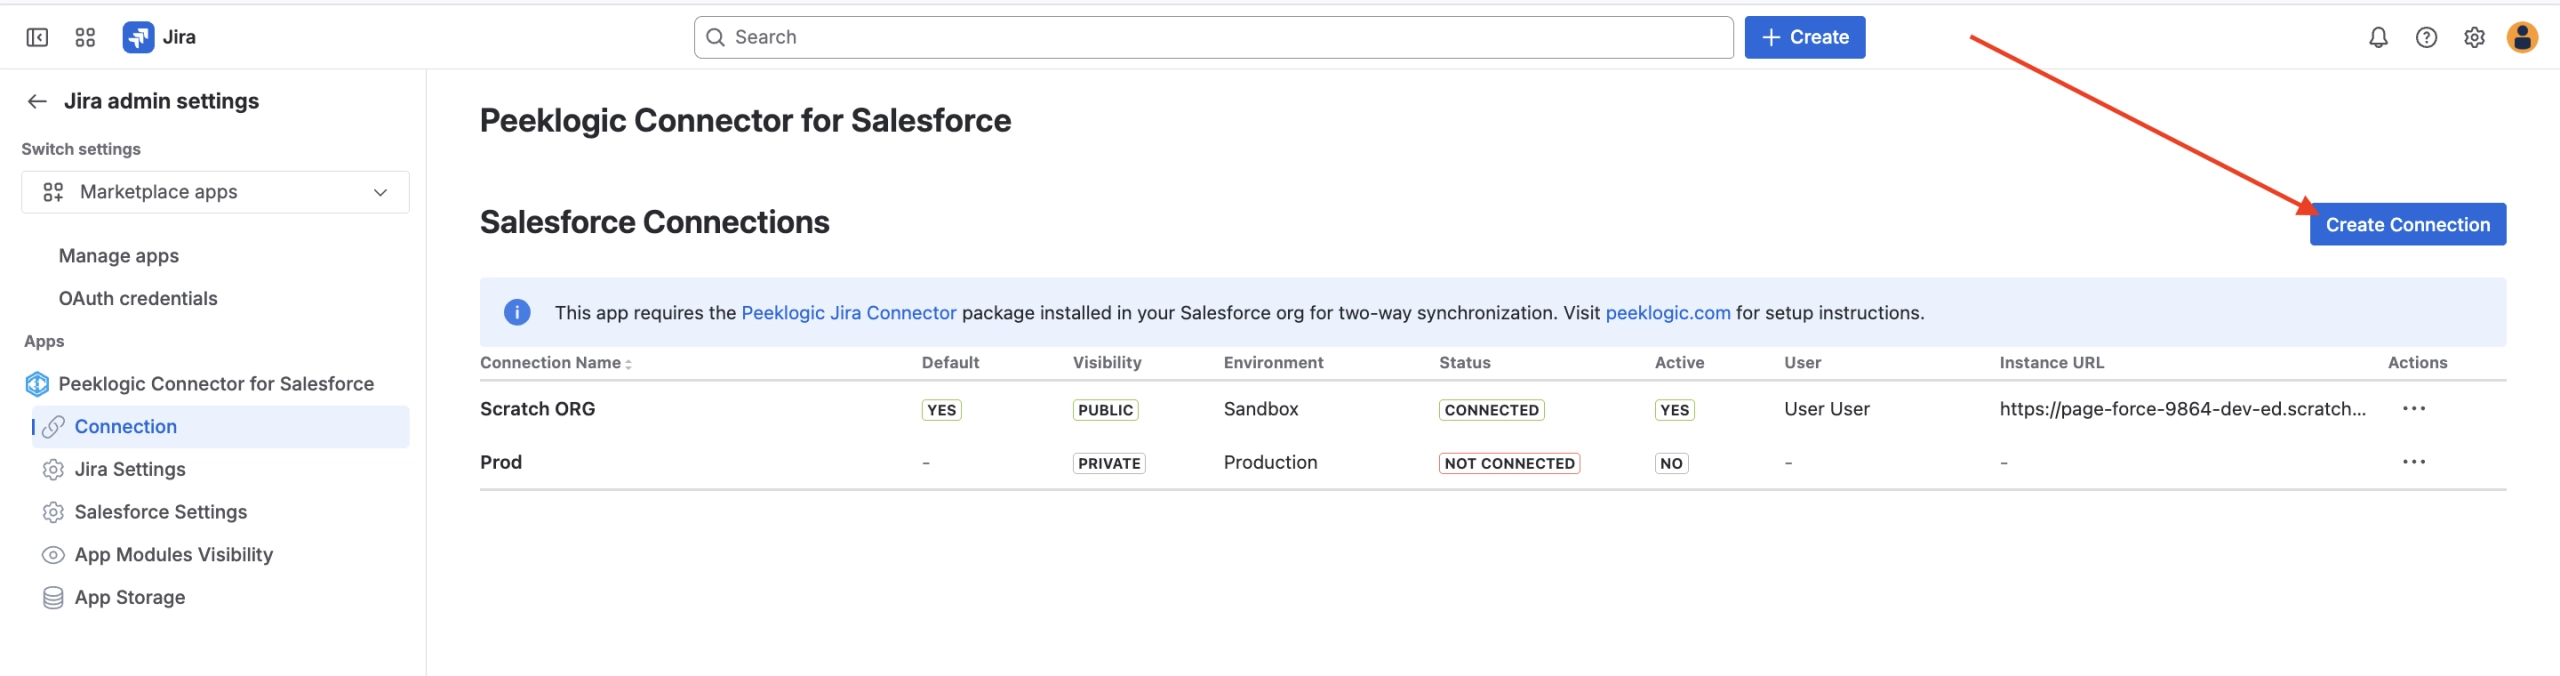
Click the + Create Connection button at the top right of the table to open the Create New Connection form.
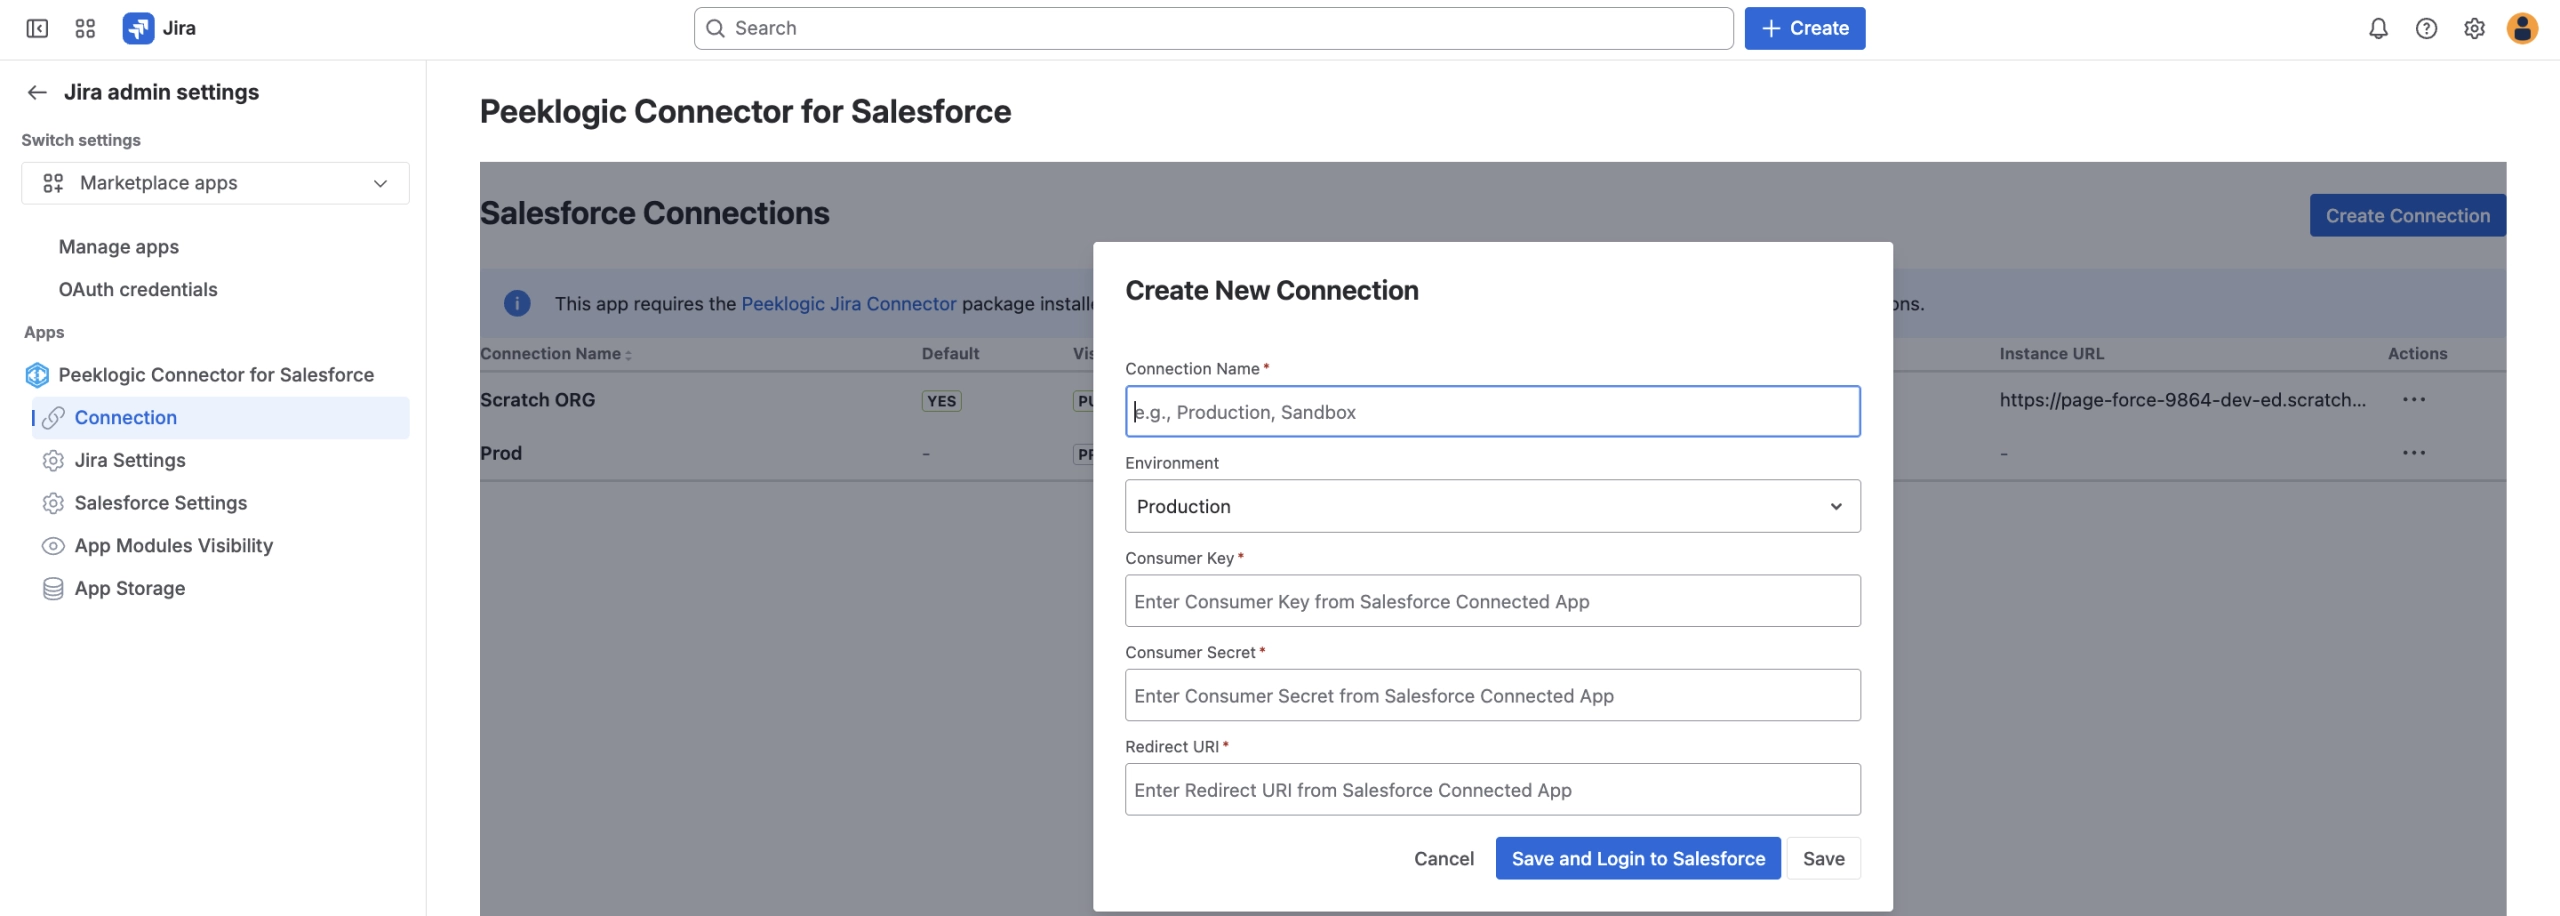
| Field | Description |
| Connection Name * | A descriptive name to identify this Salesforce org (e.g., “Production”, “Sandbox”). |
| Environment | The environment type — Production (default) or Sandbox. |
| Consumer Key * | The Consumer Key from your Salesforce Connected App. |
| Consumer Secret * | The Consumer Secret from your Salesforce Connected App. |
Click Save & Authorize to initiate the OAuth authorization flow. You will be redirected to Salesforce to authorize the connection.
Connection Actions
Each row in the connections table has an Actions (···) dropdown with the following options:
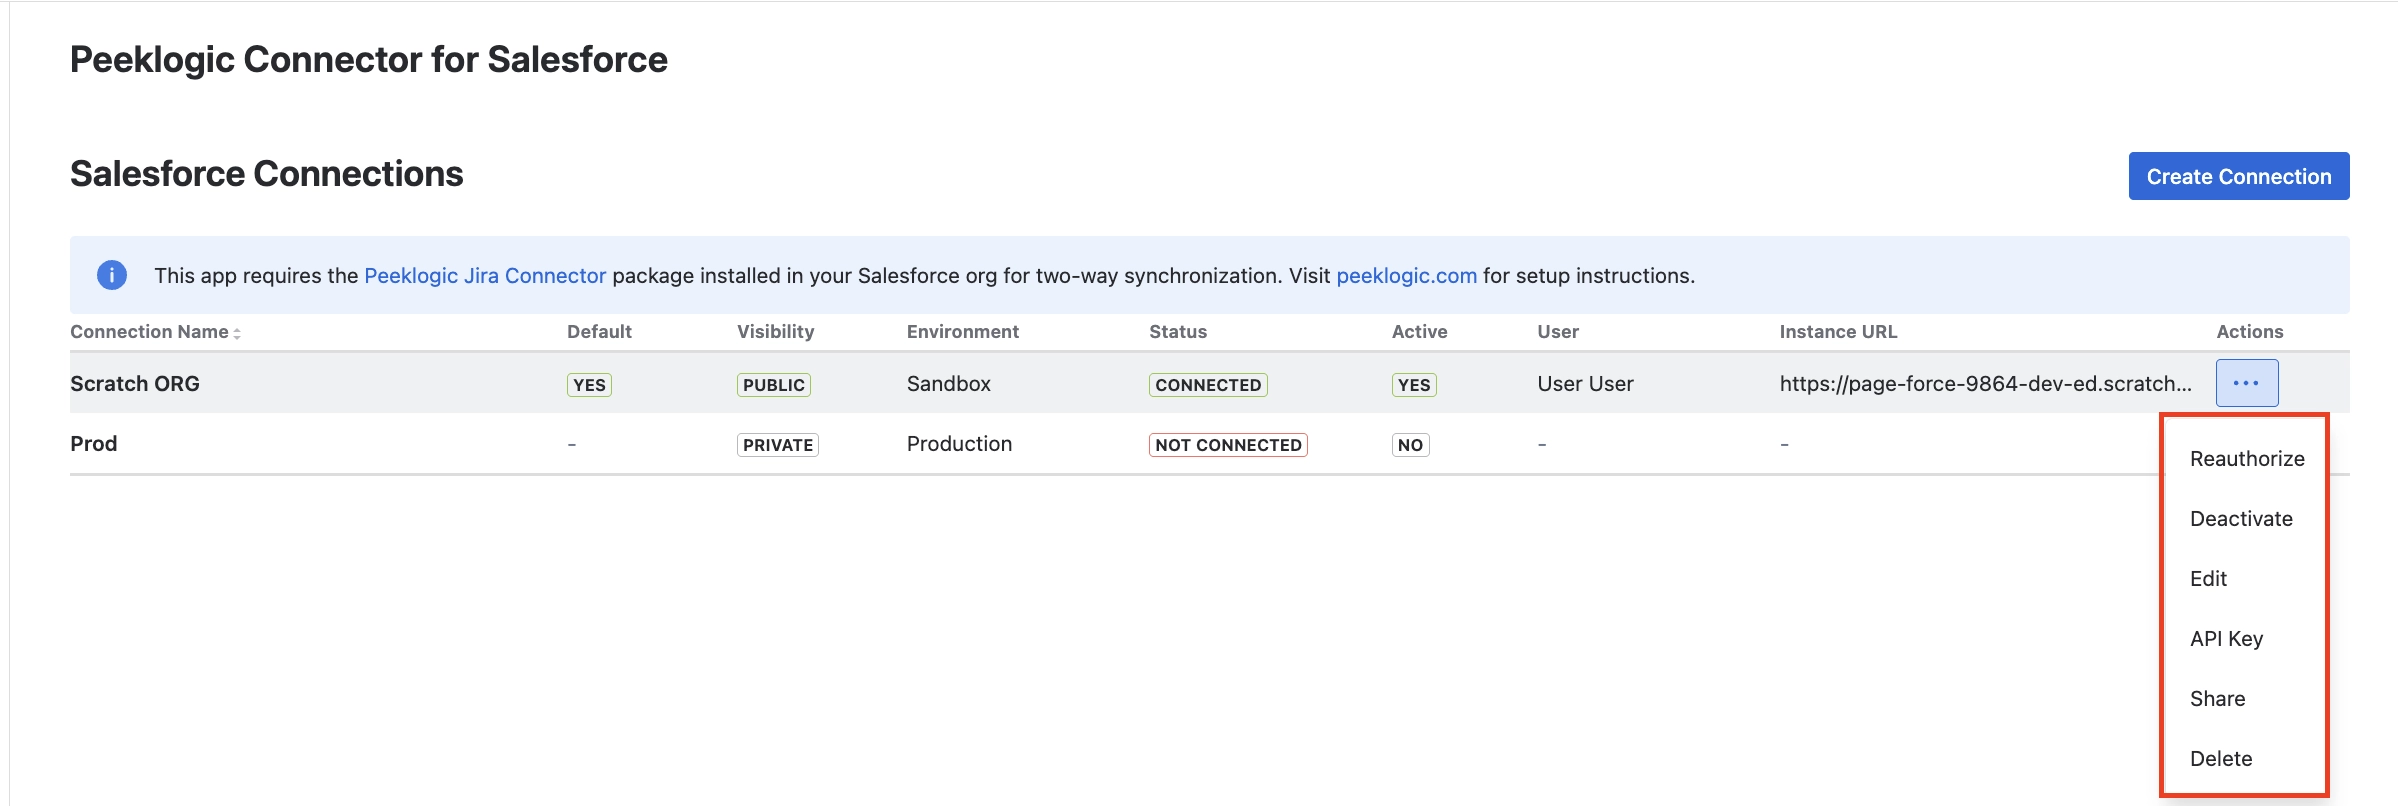
| Field | Description |
| Reauthorize | Re-initiates the OAuth flow when the connection token has expired or become invalid. |
| Deactivate / Activate | Toggles the connection on or off without deleting it. When deactivated, Active shows NO. |
| Edit | Opens the connection form to update the name, URL, or OAuth credentials. |
| API Key | Opens the API Key modal with the Web Service URL and HMAC Secret Key for automatic sync. |
| Share | Opens the Manage Access panel to control which users can use this connection. |
| Delete | Permanently removes the connection. This action cannot be undone. |
API Key Modal
The API Key modal provides the credentials needed to configure automatic synchronization from Salesforce to Jira:
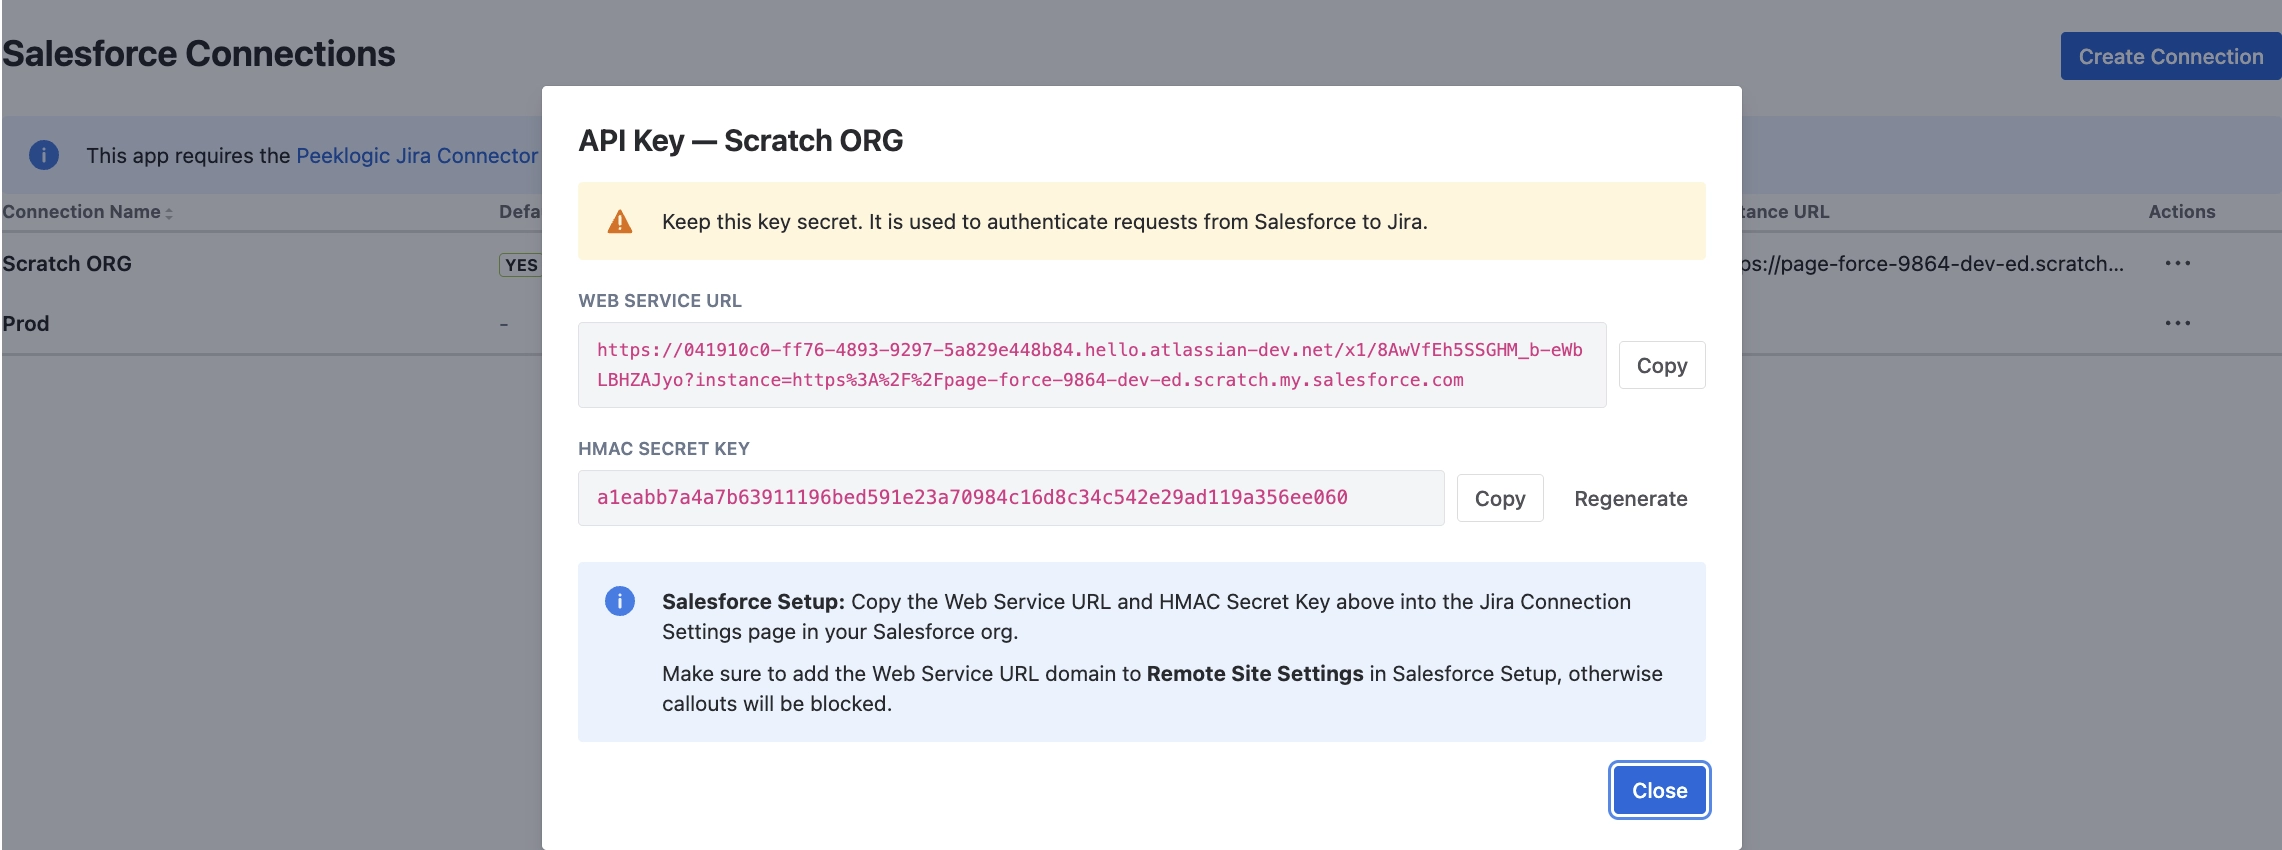
| Field | Description |
| Web Service URL | The Jira endpoint Salesforce will call to push updates. Copy this URL into your Salesforce configuration. |
| HMAC Secret Key | Authentication secret to validate requests. Use Copy to copy, or Regenerate to create a new key (note: regenerating invalidates the existing key). |
⚠️ After copying the Web Service URL, add its domain to Salesforce Remote Site Settings (Setup → Security → Remote Site Settings) before synchronization will work.
Manage Access (Share)
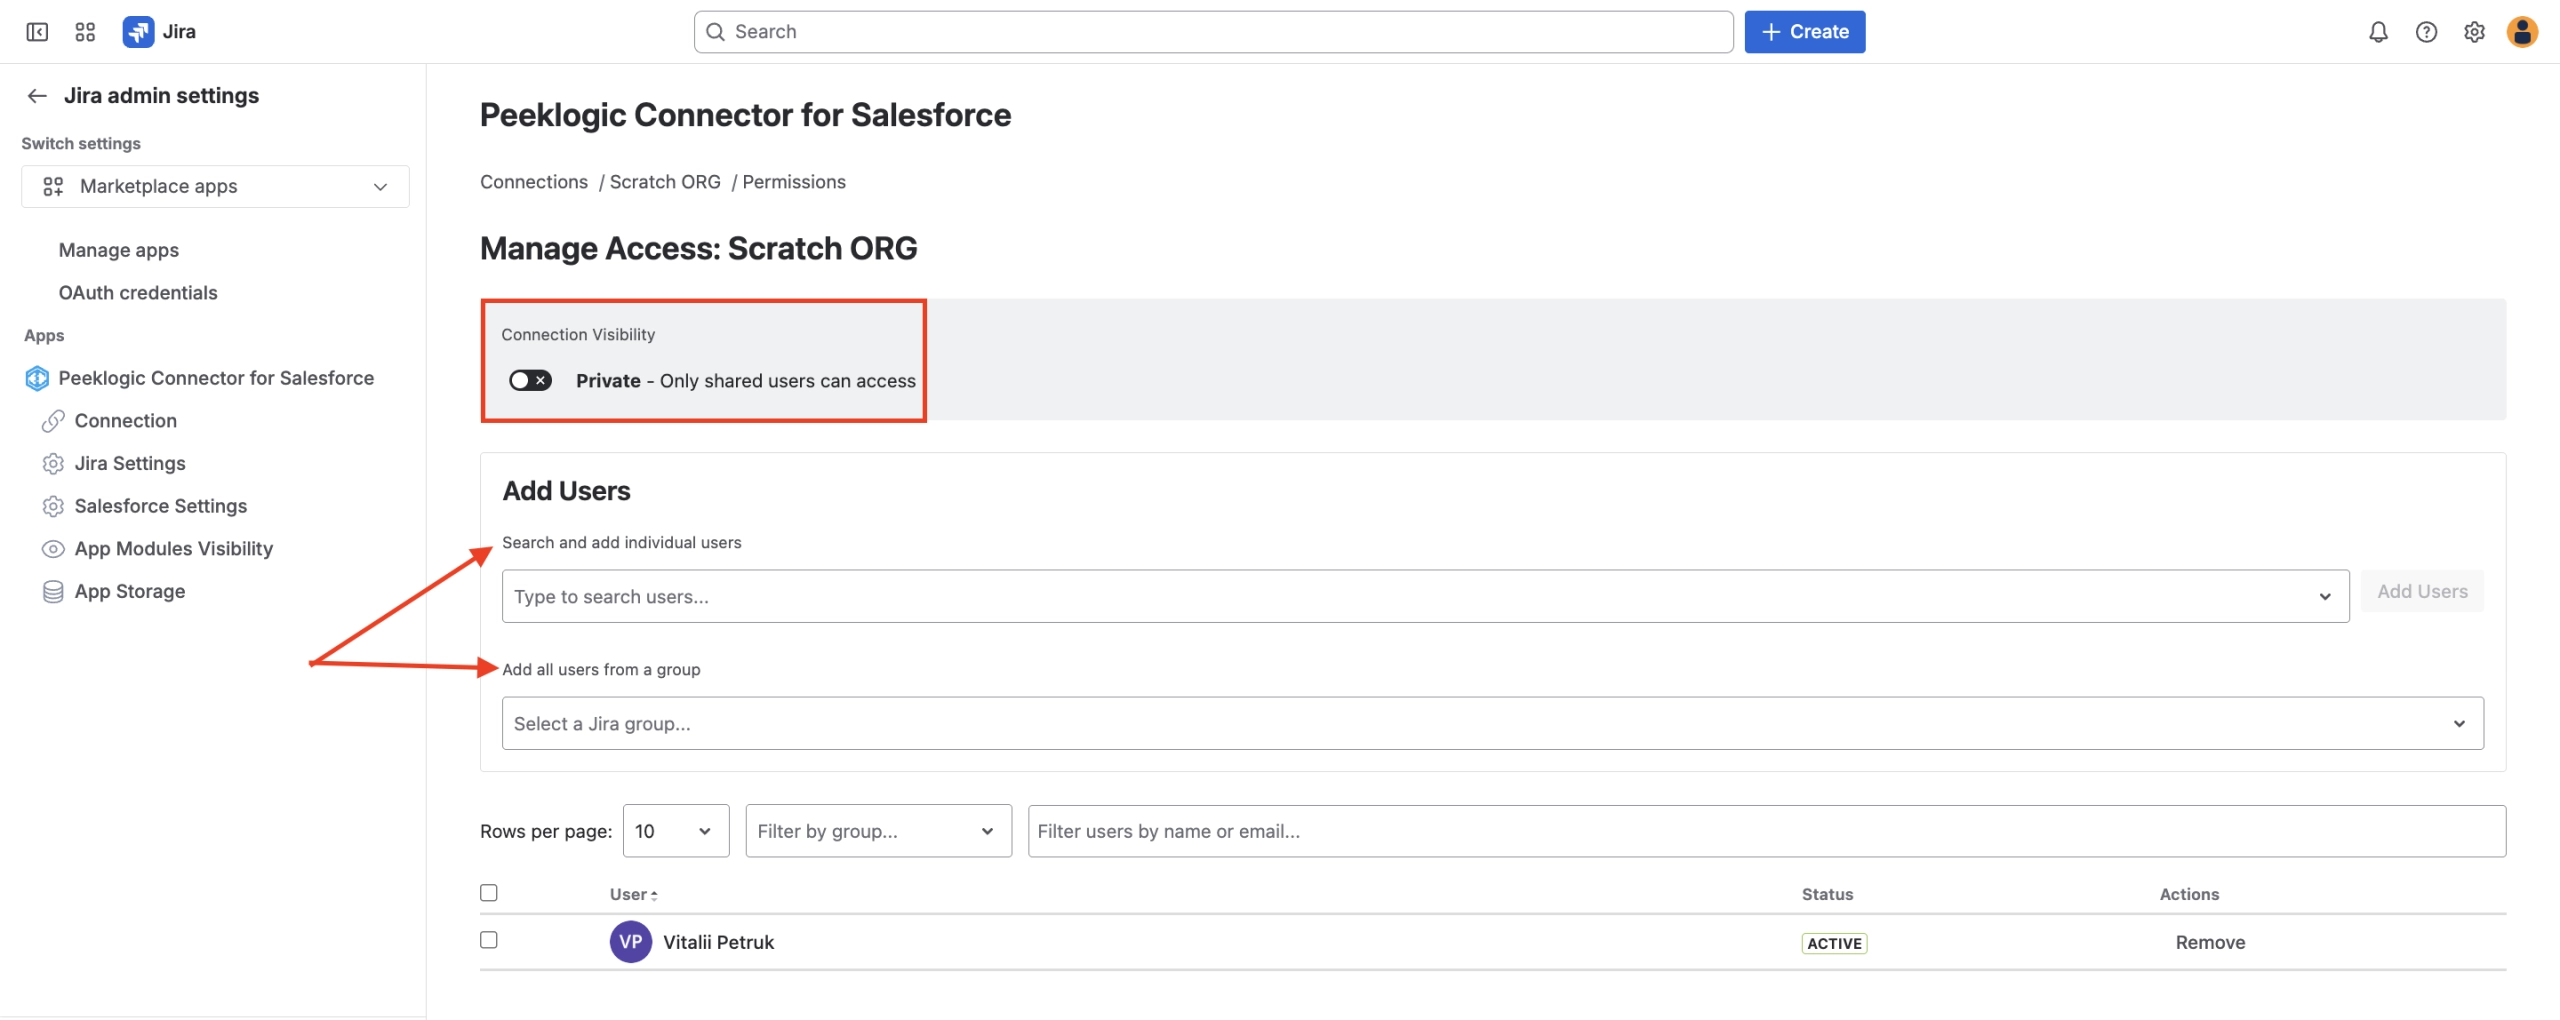
The Share action opens the Manage Access panel to control connection visibility and user access.
- Connection Visibility
A toggle at the top controls whether the connection is Public or Private. Public — visible and usable by all Jira users. Private — only accessible by the owner and users explicitly added below.
- Adding Users
You can add individual users or entire Jira groups to the access list. When adding a group, a preview shows how many users will be added and lists their names. The Users table shows each person’s avatar, name, status (ACTIVE), and a Remove button. The table supports filtering by group and searching by name or email.
5. Admin Module: Jira Settings
The Jira Settings module defines which Jira projects are synchronized with Salesforce and configures the issue types that participate in the integration. Settings are scoped to the selected Salesforce connection, chosen from the Connection dropdown at the top of the page.
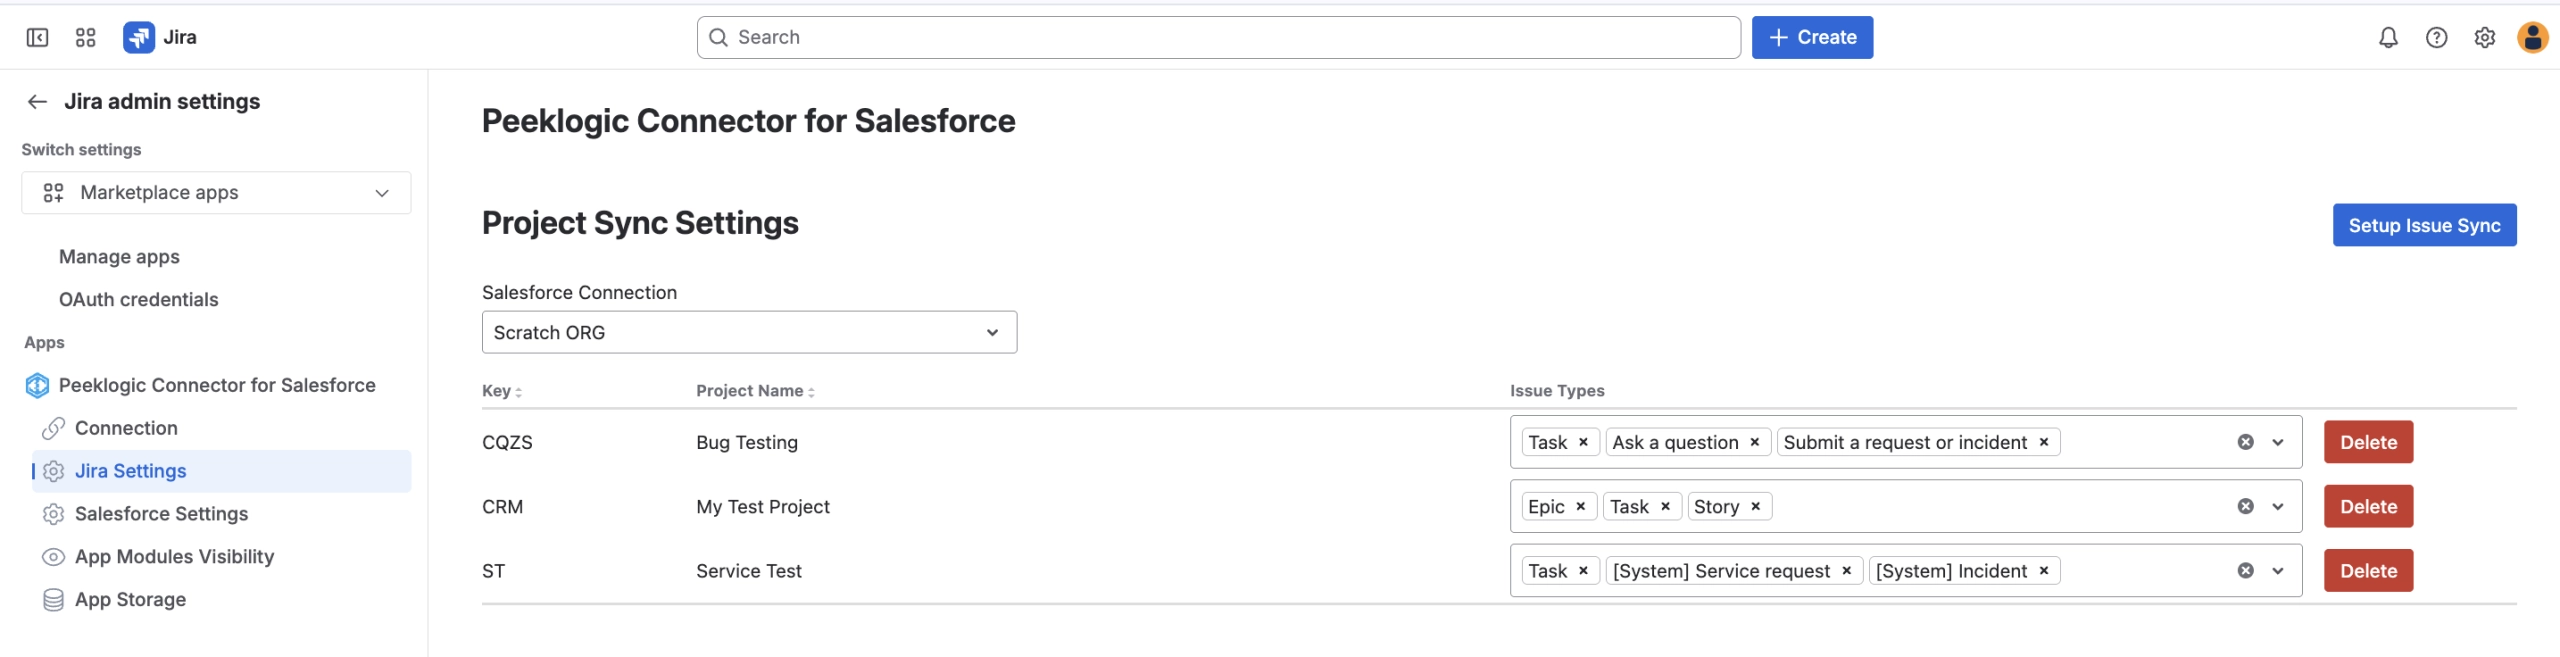
Project Sync Settings Table
The table lists all sync project configurations showing Project Name, Issue Types (as removable tags), and a Settings (⚙) icon for each row. The + New Sync Project Configuration button opens the creation modal.
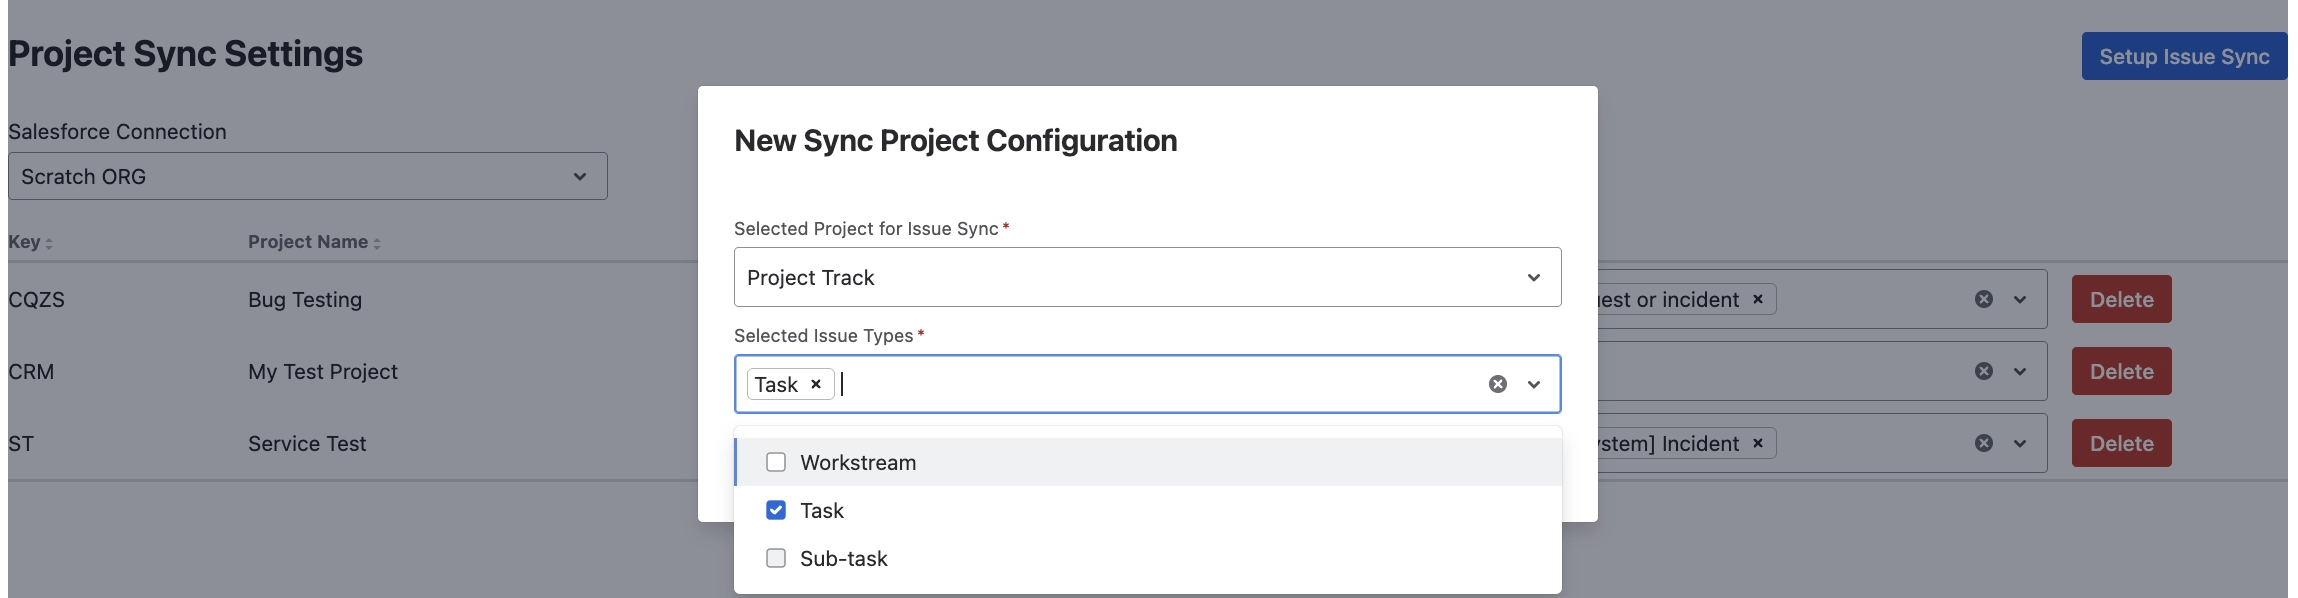
| Field | Description |
| Project * | The Jira project to associate with the sync settings. |
| Issue Types * | One or more Jira issue types (e.g., Bug, Task, Story) that participate in the sync. Selected types appear as removable tags. |
The Save & New button saves the current configuration and opens a blank modal for another entry. Click Save to save and close.
6. Admin Module: Salesforce Settings
The Salesforce Settings module is the most comprehensive configuration area of the connector. It allows you to define which Salesforce objects are available, configure the managed package namespace, control page and compact layout display, map Salesforce fields to Jira fields, and configure action buttons in the user-facing Properties panel.
All configurations are scoped to the selected Salesforce connection via the Connection dropdown at the top of the page.
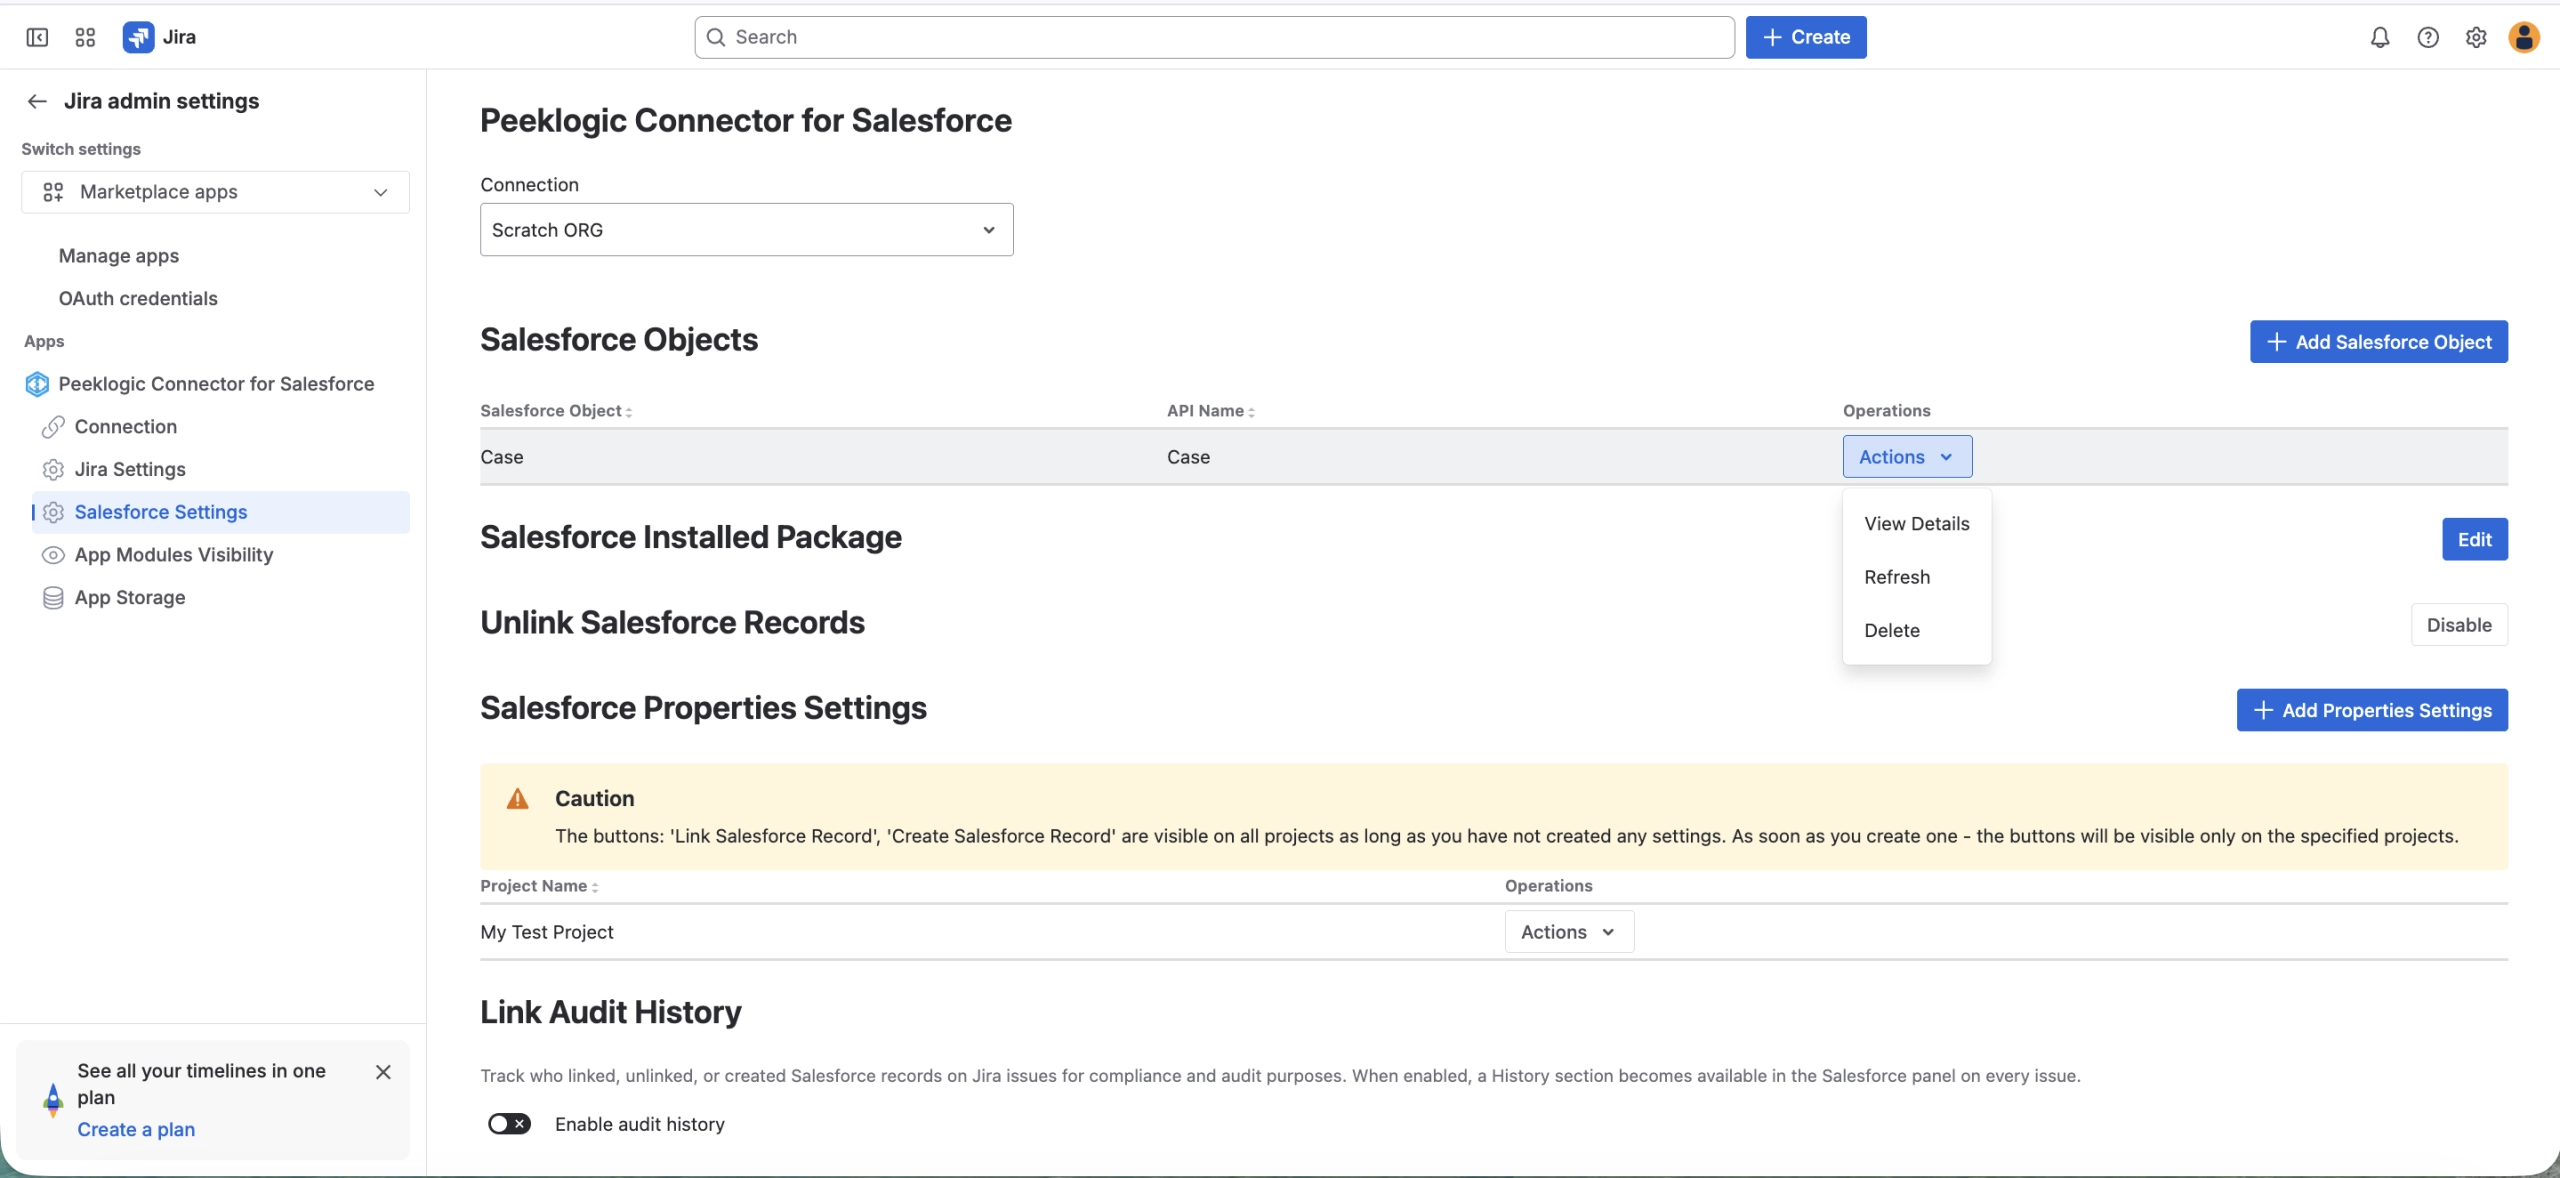
Salesforce Objects
Lists the Salesforce objects (e.g., Account, Case) available for linking to Jira issues. Each row shows the Object Name and its Salesforce API Name. Use + Add Salesforce Object to add a new object.